
July 11, 2015
The goal for the day was to water wash the previous application of fairing filler and sand to fair, spot fill and areas needing further attention, and patch the hole that was the former haws pipe on the poop deck and the hole that was the stern light. So to it...
I began by making my way around the boat with a Scotch-brite pad, a spray bottle filled with water and a towel. I spritzed the previous fill areas, now cured, scrubbed with the Scotch-brite pad, and towel dried to prepare for sanding.

Using 80-grit pads and the Porter Cable 5" random orbital sander, I made my way around the boat sanding the previously filled areas to fair. I noticed a few areas on the boat that needed yet another fill application, the stern being the primary place requiring further attention.

The motor bracket mounted on the stern was backed by aluminum plates; nevertheless, it still managed to "warp" the stern where the bolts passed through the transom. The first couple of rounds of filler brought the surfaces nearly fair, a but third application was required. Mixing a batch of epoxy, I thickened with micro balloons and used a squeegee to fill in the low spots. This should hopefully be the final fill.
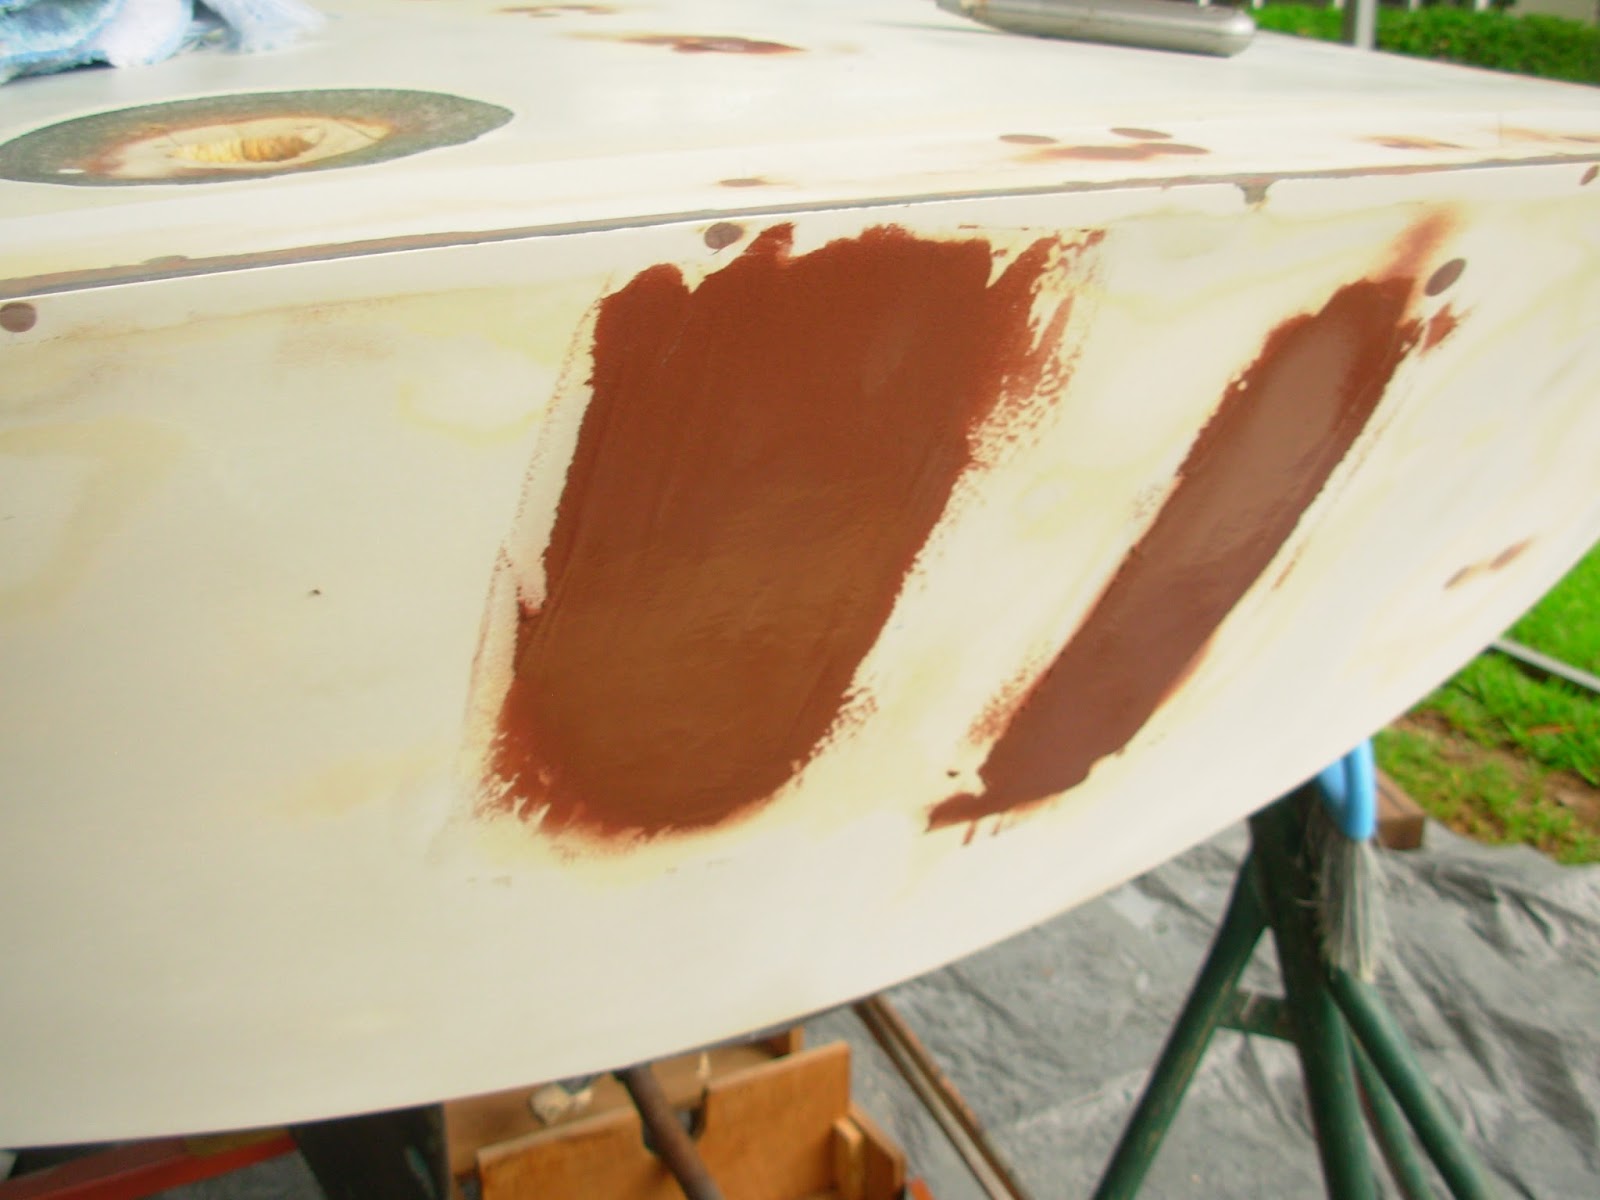
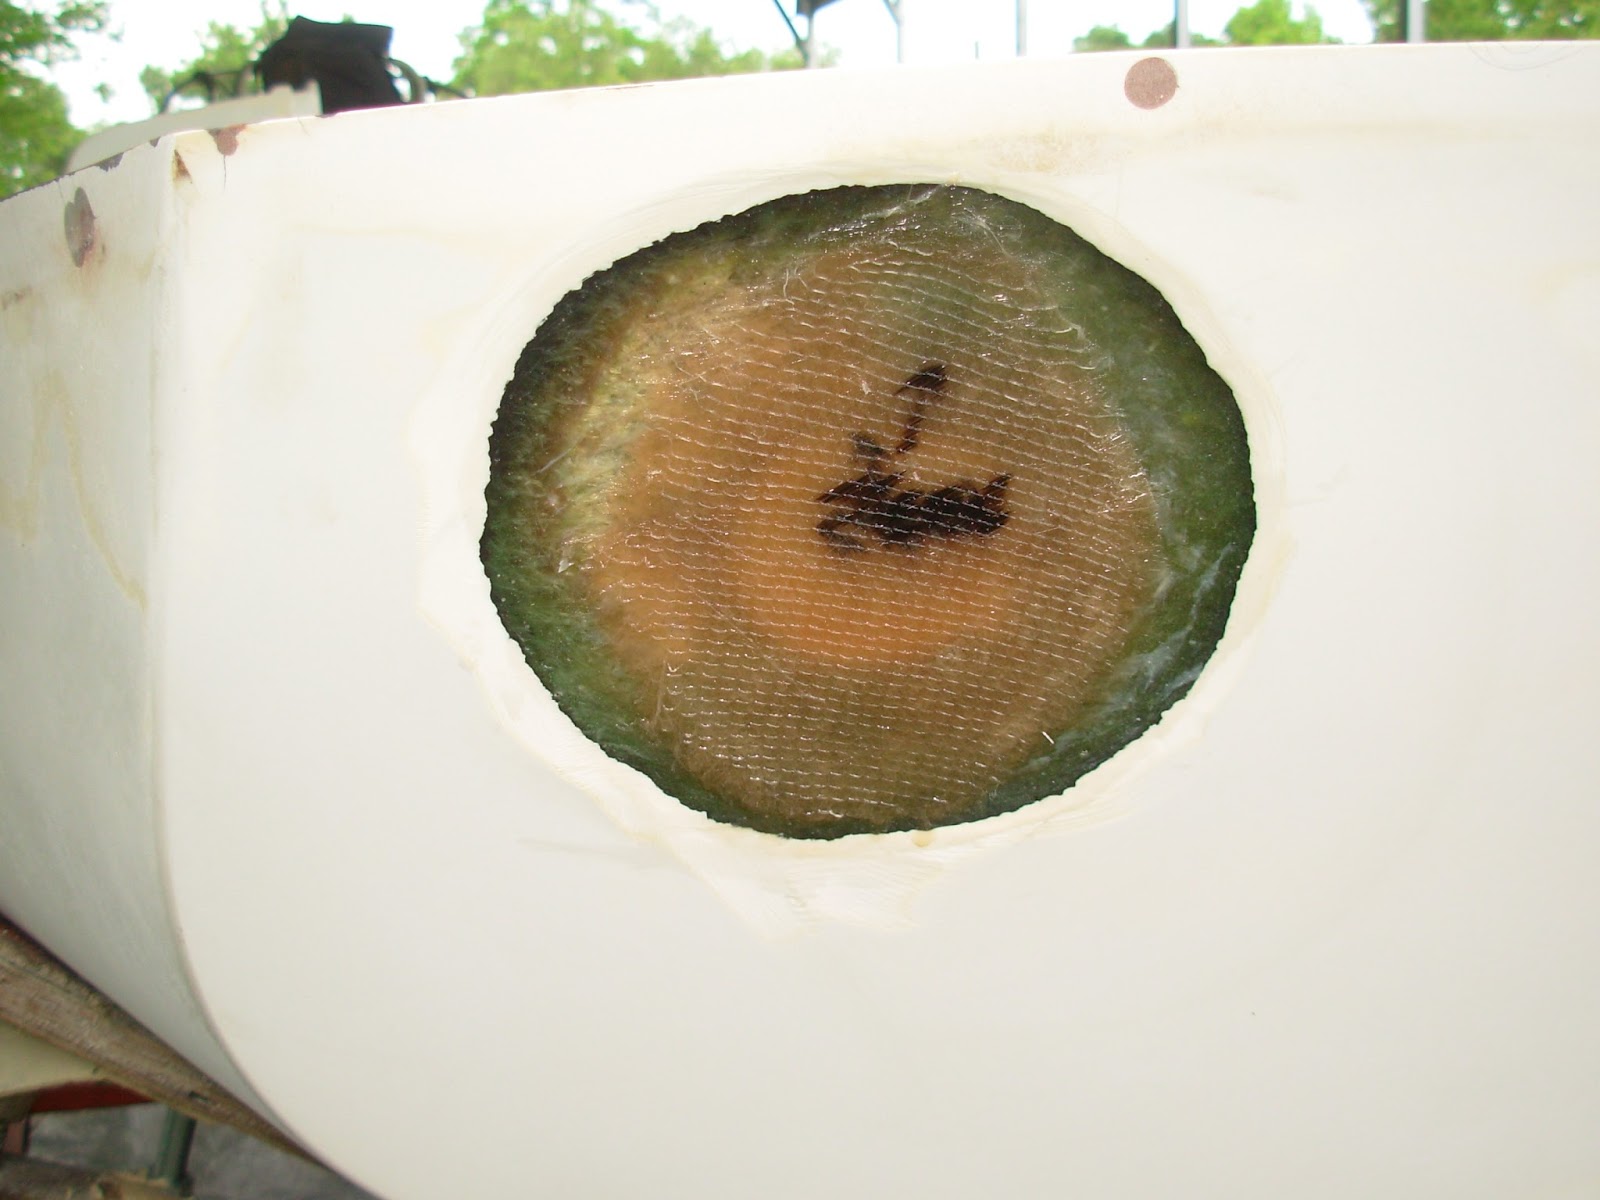
In addition to the stern fill work, I filled a few areas along the sheer line that needed a bit more. That complete, I turned my attention to the day's primary work: patching the holes holding the haws pipe and the stern light. Using a grinder outfitted with a 40-grit flap wheel disc, I ground a gentle taper around the holes. These tapered grinds would be filled and patched with at least two 1708 biaxial patches, and the filled and brought to fair with the adjacent surface.

Before applying the patches, I need to create a "backing" for the filler and patches to adhere to - creating a structurally sound patch. I used a rough 6" x 6" square of 1708 biaxial, fully wetted with epoxy, resting on a sheet of plastic, and adhered both the fiberglass and the plastic to the underside of the poop deck. Before applying the fiberglass backings, I sanded the underside of the poop deck with a pass of the Porter Cable and a 40-grit pad, and then cleaned the surfaces well with acetone.

After applying the backing to both holes, I took on other duties to allow sufficient time for the epoxy backing to tack up. I turned to sanding the companionway hate, and worked the surfaces with 80-grit paper with the 5" sander and by hand, as was required in the tight corners and transitions. After completing the companionway hatch, the epoxy bonding the backings to the underside of the poop deck had becoming tacky, or partially cured, and was ready to take the filler and patches. I wetted the exposed core on the poop deck and the surrounding fiberglass - I also did this to the transom, though the transom was not cored.

the photo below shows the stern light hole, backing cloth, with the surrounding fiberglass tapered and in the process of being wetted to accept the 1708 biaxial patches.

Just prior to wetting the surfaces with epoxy, I made a couple templates of the patches to be applied to both the haws opening and the stern light opening. Using a small sheet of plastic, I traced two circles per opening that would be used to cut patches from the 1708 biaxial cloth.

The photo above is of the transom; the photo below is of the poop deck.

And the patches for both openings.


Prior to placing the patches onto the openings, I mixed a small batch of epoxy and thickened it with colloidal silica and applied this to the holes themselves - filling the holes up to be fair with the shallowest grind of the taper.

The last step was to place the wetted 1708 cloth patches onto the tapered holes.
In the coming days, I will water wash, fill and fair these areas. In reviewing the work as I was closing up shop for the day, I noticed that I may have to add another layer of 1708 biaxial to the transom hole (the former stern light). Eventually, both areas will be brought to fair with their adjacent surfaces, primed and painted. That would conclude the day's work.

Total Time: 6 Hrs.
No comments:
Post a Comment