Cape Dory Typhoon, Weekender

Cape Dory Typhoon, Weekender

Thursday, November 26, 2015

Brightwork, Outboard Bracket, and Deck Fairing

November 26, 2015


I finished up the installation of the starboard coaming board in the morning, completing the dry-fit installation of the coaming boards.  


The fasteners being used are 1/4" 1 and 3/4" long machine screws with finish washers, backed with a washer and a nut - eight per coaming board.


I also took the opportunity to bore a hole at the aft end of each coaming board to accept a bung, I used a 3/8" forstner bit and then drilled a pilot hole for the eventual #8 pinhead screw.


....and the port side.  You will notice that I have not rounded the edges as of yet  -this will be done after I remove the coaming boards for final paint work.


I also marked and over-drilled for the outboard bracket.  The Cape Dory Typhoons came with a bronze outboard bracket that hung off the taff rail and was removable when not in use.  The bracket inserts into the base (pictured) and then articulates down to rest on top of the taff rail.  Today, I settled on the location of the base and then marked the location of the fasteners.  Next, I drilled a pilot hole through the poop deck and then followed that with a 1/2" forester bit.  The larger hole will be filled with thickened epoxy and then tapped for silicon-bronze machine screws, backed with a 3/8" thick fiberglass backing plate.


I "washed" the holes with acetone and then wetted the core with neat epoxy...


...after which, I filled the over-drilled holes with epoxy thickened with colloidal silica and micro -balloons.  I will sand the surface and apply another coat of epoxy primer prior to drilling and tapping for the machine screws.


I also took the opportunity today to repair some of the larger cracks in the gelcoat.  I used a spiral saw to open up of the cracks so that I could apply epoxy thickened with micro-light - a fairing compound that sands easily for final fairing work prior to painting.  The picture below is forward portion of the cockpit sole at the base of the companionway.


I also took care of a few cracks at the base of the starboard cockpit seating (below).


Additionally, I took care of the cracks at the base of the mold fiberglass backrest on the port side.


Finally, I finished up the over-drilled fastener holed for the foredeck cleat.  I prepared these holes the same way in which I prepared the base for the outboard bracket.


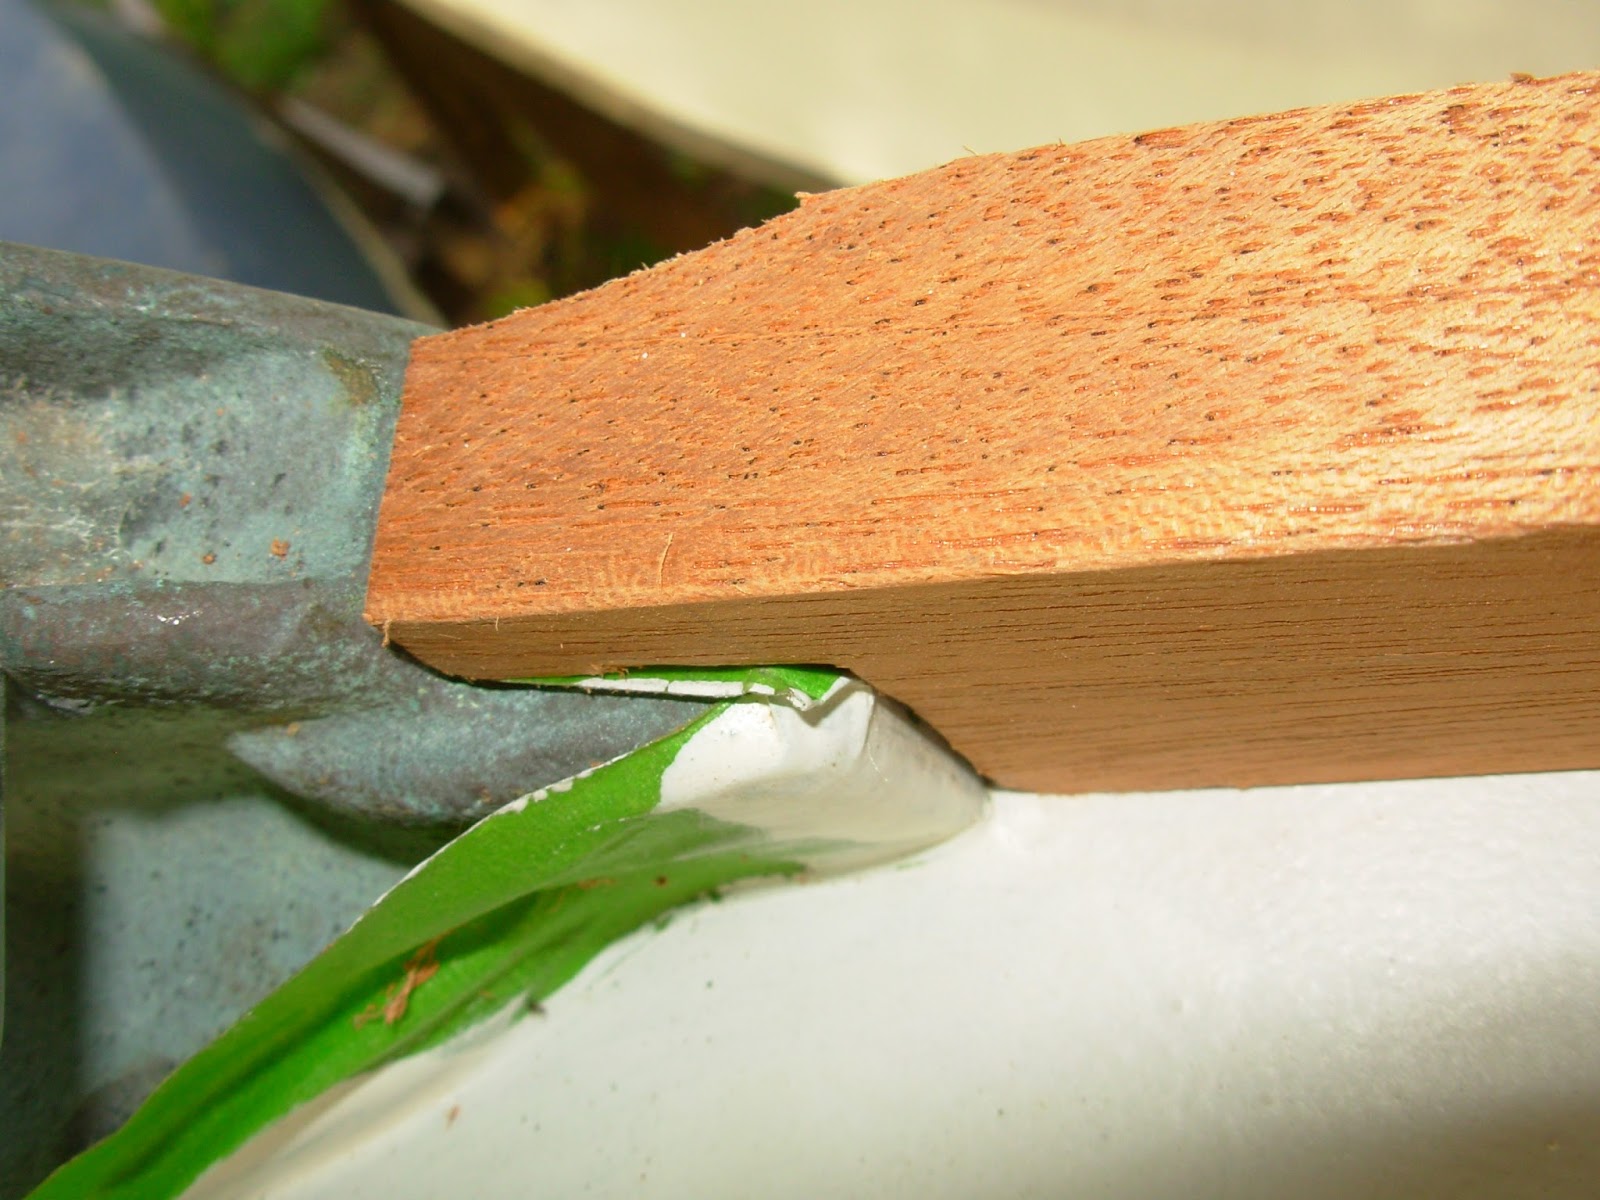
The last item on the list for today was to glue and screw the forward returns for the coaming boards.  The returns bridge the opening between the forward end of the coaming boards and the cabin sides.  I "washed" the mahogany with acetone and then wetted the surfaces with neat epoxy.  Later, I thickened some epoxy with micro-balloons and set the returns in place.


To keep things clean, I taped the areas to be glued.


With a small squeegee I cleaned up and squeeze out, fore and aft of the returns.


I had intentions of using clamps to maintain pressure, but in the end I felt I did not need the additional force having made good contact and achieving good squeeze out.


Total Time: 4.5 Hrs.

Wednesday, November 25, 2015

Continued Focus on the Brightwork


November 25, 2015


Westsail 42....coming soon.

I'll just come right out and say it folks...I have no pics for you today - full apology.  My focus, and I guess I was extremely focused today, was to continue the dry-fitting of the brightwork.  I managed to removed the recently installed toe rails, which included having to hacksaw through about 6 of the #10 fasteners.  In the process of installing the toe rails last week I managed to break-off the heads of these six fasteners.  In the spirit of full disclosure, I must admit to you that I used the wrong drill to secure the toe rail fasteners during the dry-fit stage...an impact wrench.  I used it to speed up the process of drilling pilot holes and securing the fasteners while not having to change the drill bit each time.  Because I could not find my alternate drill, I conceded to the use of the impact wrench.  My plan to deal with the unusable hole in the toe rail is to simply fill it with a bung, and then drill a new fastener hole an inch to an inch and a half from this "mock" fastener hole.

I used a grinder to take off the portion of the fasteners I had removed with the hacksaw. I ground the stub ends down to the deck level being careful not to grind into the fiberglass.  I also ground down the stub end sticking out of the underside of the toe rail.  Satisfied with the toe rails and having a plan for their eventual finish installation, I turned to the coaming boards.

I first took the port coaming "blank" and fitted it to its eventual home by making several angle just with a small Japanese saw.  With the port coaming board roughed-in, I then placed the starboard coaming board in its position and then used a jack and a small length of  1" X 2" to press the boards into the molded fiberglass coaming shape.  With the boards pressed into the position they will hold when finally installed, I marked along the outside of the coaming board at the point where the board rose above the molded fiberglass backrest for the cockpit seat.  I later used this line to position the fasteners for installation.  The boards were both about 71" in length.  I spaced out the position for eight 1/4" philips head machine screws. I pre-drilled on the marks, and then followed up with a 1/4" pre-drilling.  

After both boards where pre-drilled for their fasteners, I once again placed the boards in their final resting position secured with the jack and brace.  With the boards in position, I used #7 drill bit to marked the point on the molded fiberglass backrest for pilot holes.  I then removed the boards, and with the #7 bit, I drilled holes for the fasteners.  Before I dry-fitted the coaming boards, I tapped for the 1/4" machine screws.  After the fastener holes were tapped, I again mounted the coaming boards with the jack and brace and secured the port coaming board.  The 1/4" machine screws are mounted with finish washers and backed with 1/4" nuts and washers.

I will complete the starboard coaming board tomorrow and then turn my attention to the preparing for installation of deck hardware.

Total Time: 5 Hrs. 

Sunday, November 15, 2015

Dry-fitting the Toe Rails


November 14, 2015


After taking care of the lawn work - yes, I am still cutting the lawn well into November! - I went straight into dry-fitting the toe rails.  The toe rails were purposely scaled up in size just a "hair"and this would require some detailed fitting work - namely where the rail joins the bronze stem fitting.  


With a miniature Japanese saw I encouraged the new toe rail into the stem fitting.


After the toe rail was made to feel at home adjacent the stem fitting, Maggie (my helper for the day) and I focused on installing the toe rail.  With the holes drilled out for the bungs already I countersunk the base of the holes and then processed to drill pilot holes for the #10 fasteners.


With the pilot holes drilled I secured the rail to the deck with the #10 screws.


Making my way aft...


Maggie enjoyed a moment of satisfaction after the starboard rail was installed.


In the end, we completed both the starboard and port toe rails.


We had some issue with the rub rail, and so scratched that installation from the docket.  I failed to countersink for the fasteners, and so the first one I attempted to install split the new, beautiful mahogany rail!  I am actually on the fence on whether I will even use the rub rail...the toe rails look great as they are.


With homemade chicken soup on the menu, we wrapped up the day's work and closed the shop.


Total Time: 3 Hrs.

Saturday, November 14, 2015

Preparing Rail Fastener Holes & Fitting SB Coaming

November 13, 2015


The AM was spent participating in a 5K run - a relaxing run around a beautiful neighborhood!  When I came around to getting back on the boat for some work I decided to prepare the rub and toe rails for their fasteners.  I brought the portable drill press onto the back porch, set up a couple blocks on opposite sides of the press to support the length of rails, and then got to measuring the location of the fasteners.  I measured and made a pencil mark every 8" down the length of each rail, I then followed that with a quick tap of a finish nail on top of the pencil mark to allow the drill bit to self-center itself.


The bit I choose was a forstner bit, 3/8" in size.  I set the depth to allow plenty of room for the head of the screw (I originally was leaning toward pan-head screws, but I choose countersunk in the end) as well as room for repeated sanding work - if need be. 


The process for drilling the bung holes was: slide the rail into position, lower the bit until the pilot point just engages the mark made by the finish nail, raise the bit, turn power on, lower bit until it bottoms out on the depth gage, raise the bit, turn the power off, and then slide the rail for the next boring.


The process was pretty straightforward...just time consuming.


After the toe rails were finished, I then turned to the rub rails.  The rub rails were shallower in depth, so I adjusted the depth gage to the appropriate position.


Like the toe rails, I followed the same process for drilling out the bung holes on the rub rails.


After I finished all of the rails I carried them over to the boat and placed them on the side decks.  I then turned my attention to fitting the starboard coaming board into position.  The last time I had worked on the coaming boards I had simply cut them out of the planed mahogany planks, now came the fitting work - adjusting the surfaces and angles until everything fit properly.  I was able to finish most of this fitting process by the end of the day.  I will dry-fit the rails tomorrow.


Total Time: 4 Hrs.

Thursday, November 5, 2015

Gluing Up Starboard Toe Rail

November 5, 2015


Wanting to get the last of the rails glued up, I took an hour this evening and prepared the starboard rail for just this task.  I sanded the starboard rail to remove imperfections imparted onto the boards from the table saw, wiped down the scarf joints with acetone to remove the sanding residue, and then wet out the scarf joints with neat epoxy.


I allowed some time between wetting out the scarf joints with neat epoxy (epoxy not thickened with filler agents), but then mixed up some epoxy thickened with colloidal silica and micro-balloons.  I then applied the thickened epoxy mixture to the scarf joints and then clamped those joints securely.


I removed some most of the squeeze out.


My next task will be to shape the rails and pre-drill for eventual installation.


Total Time: 1 Hr.

Tuesday, November 3, 2015

Gluing Up Port Toe Rail

November 3, 2015

I wanted to take some time this evening to glue up the port toe rail, so my first order of business was to perform a cursory sanding on the three boards that would ultimately make up the port toe rail.  The sanding was to remove blemishes left from the table saw blade, and to just generally prepare the boards for glue up.

I sanded the boards with 80-grit pads on the random orbital finish sander.  With the sanding finished, I wiped the boards down with acetone to remove the sanding residue - preparation for the epoxy work that would come next.  


Just before I got to gluing up the port toe rail I removed the rub rails from their clamps to review the weekend's work of gluing up the rails.  I had used sheets of plastic to prevent the clamps from becoming epoxied to the rail itself, as a result I could not get a good visual on the line up of the scarf joints.  I relied on feeling the scarf joint to ensure that I did, in fact, have good alignment.  However, I had a couple poor performances on the scarf joints - not bad, but not to my liking.  I sanded down the cured squeeze out, and prepped the small voids for further epoxy fill.

My next task was to again wipe down the port toe rail's scarf joints, and then applied 'neat' epoxy to the joints to saturate the wood to ensure a good mating of the joints.  With the balance of neat epoxy that I mixed up to wet out the toe rail I thickened it and applied to the small voids on the rub rails - problem solved.

Finally, I mixed up another batch of epoxy and thickened it with colloidal silica and micro-balloons and spread onto the scarf joints.  Taking 4 clamps per joint, I made sure I had good alignment and squeeze out this time - choosing not to use the plastic sheeting.

All looks good for the port toe rail.


Total Time: 1 Hr.

Sunday, November 1, 2015

Toe and Rub Rail Fabrication, Part 2

November 1, 2015


Picking up where I left off on Saturday, I fed each of the rub and toe rail blanks through the router to create a shallow rabbit on their underside.  The reason for the rabbit is to provide a space for the bedding compound (polysulfide) to ooze into as the rails are fastened to the deck and topsides.  Preventing most of the polysulfide from squeezing out will help protect against water intrusion.

The router bit I used was 1/2" in width.


The first toe rail blank that I ran through the router turned out NOT to be to my satisfaction - I set the depth of the router bit too deep.  It's a good thing that I had nine boards to choose from in selecting the 6 boards I would need for both toe rails, so accepting my error I lowered the bit to create a shallower rabbit...problem solved.


Once I had all nine boards run through the router I turned my attention to the rub rail boards.


I used the same 1/2" router bit to create a similar rabbit on the underside of the rub rails.


My next step was to lay out the eight rub rails blanks to then select the best 6 for the starboard and port rails, and to select those boards best fit for either the starboard side or the port side.


After finalizing my decision on the 6 boards, and the boards that would fill out the port and starboard rails, I then recreated the bevel on the topside of each rub rail blank.  I did not bother to measure the exact degree of the angle - my guess would be a 6 to 8 degree angle. 


With the bevel applied to each of the boards' top side, I then prepared all rails for scarf joints.


I started the scarfing task with the toe rails. Prior to running the boards over the table saw with the scarfing sled I selecting the best 6 blanks from the nine available to me, also choosing which boards would be best for port and starboard.


Clamping each of the boards on the sled, I ran them over the table saw with the scarfing sled to create a 12:1 scarf joint.


A simple, early project was now coming in quite handy.


Once I had cut scarf joints in all of the rails I then cleaned up some the table saw's slop (marks) with the finish sander.


I laid out of the rub rails on the back patio, on top of some plastic sheeting.  To create the best bond possible I wiped down the scarf joints with acetone to remove sanding dust and any other contaminates that could hinder the best bond possible.  After cleaning the surface I applied a coat of "clean" epoxy - just resin and hardener.


After waiting ~15 minutes for the unthickened epoxy to saturate the grain - time I used cleaning up the shop and grabbing a cold drink - I mixed up some epoxy thickened with micro-balloons and colloidal silica.  I applied a liberal amount to each of the scarf joints and then proceeded to clamp the joints.  Tomorrow I get to see how well I clamped these joints (fingers crossed).


Total Time: 5.5 Hrs.